How to Replace Your Lawn with Native Plants (Step by Step)
The short version
- Sheet mulching (cardboard + mulch) is the easiest way to kill grass without herbicides. Start 6-8 weeks before planting.
- A phased approach (one bed per season) is less risky and more manageable than ripping out the entire lawn at once.
- Apply for rebates before you begin. Georgetown offers up to $5,000/year and most programs require pre-approval.
- Spring is the best time to start because new plants get a full growing season to establish roots before summer.
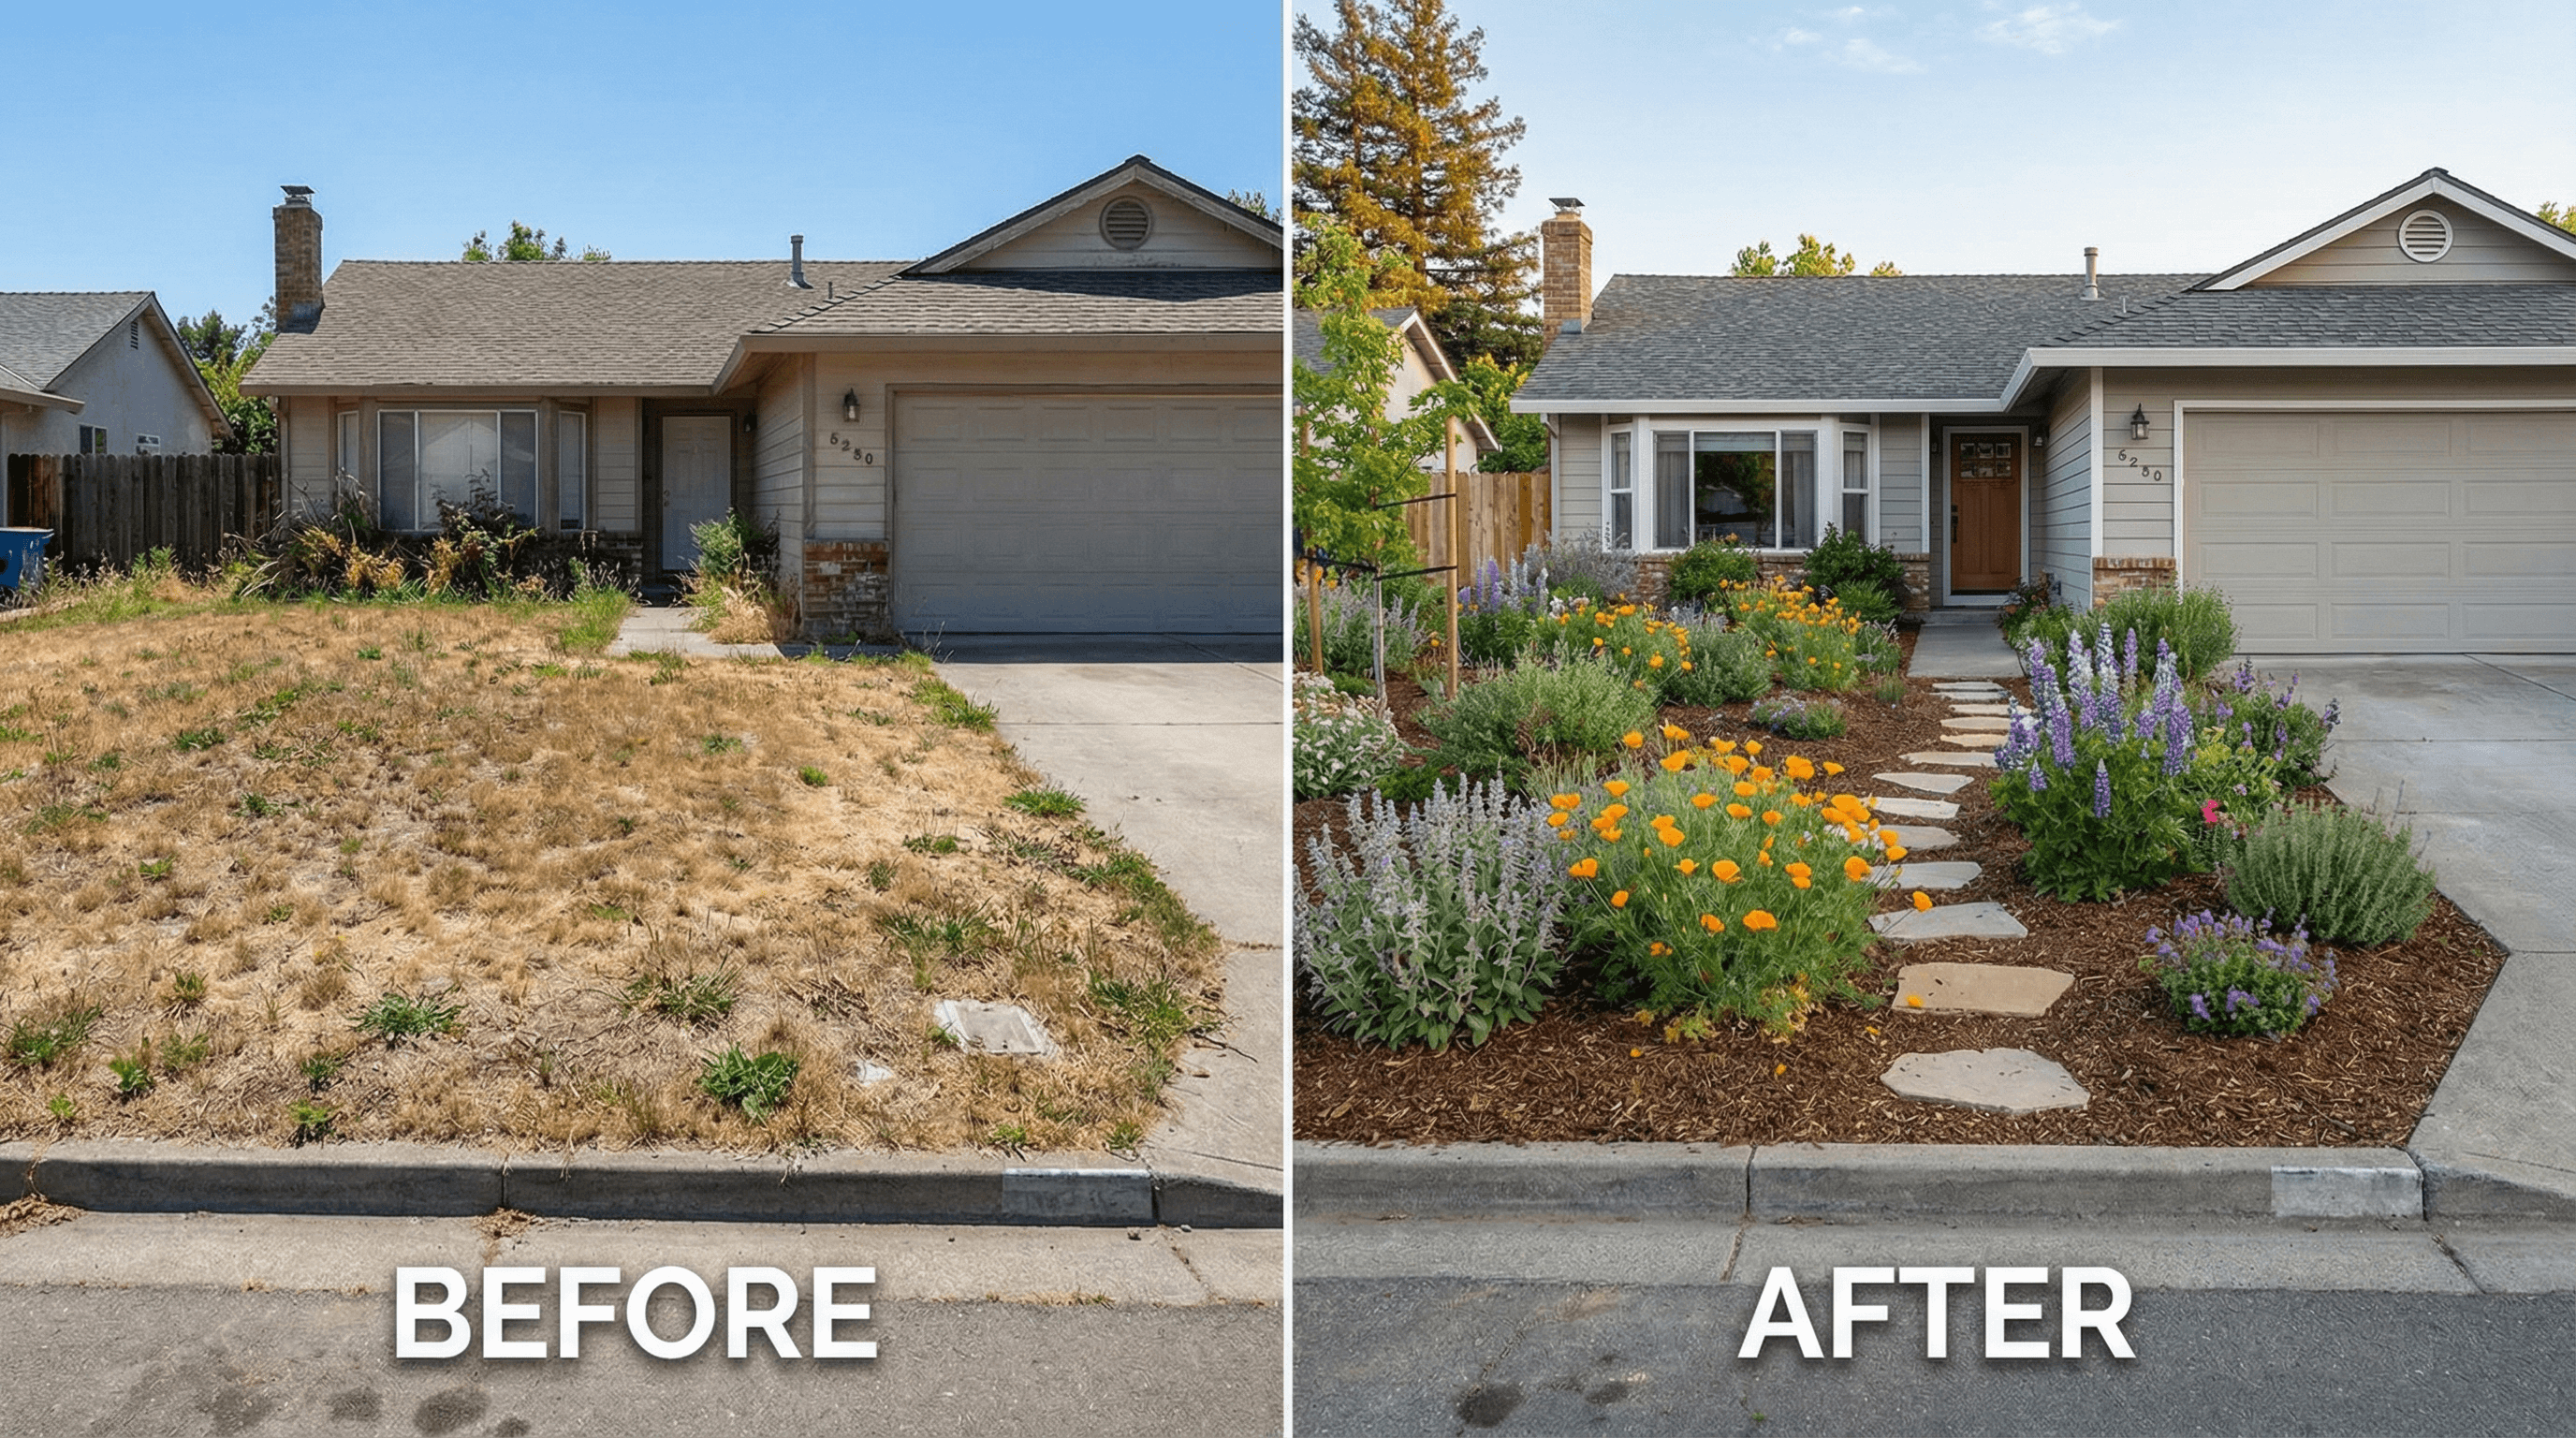
You've been thinking about it. Maybe you've spent another summer mowing in 100-degree heat, wondering why you're keeping all this grass alive. Or maybe the water bill finally crossed a line. Either way, you're ready to replace some (or all) of your lawn with native plants. It's not as complicated as it sounds. You just need a plan and some patience.
This is the full process, from "I'm thinking about it" to "my yard looks great and I haven't mowed in months." If you want background on why natives are worth the switch, start with why you should stop watering your lawn. For a broader overview, our getting started guide covers the fundamentals.
Step 1: Check for rebates first
This comes first for a reason. Many city and water utility rebate programs require pre-approval before you start any work. If you rip out your lawn first and apply later, you might not qualify.
Don't skip this
Austin offers up to $2,500 for lawn replacement. Georgetown has some of the highest rebates in Texas, up to $5,000. Most programs need before-and-after photos and pre-approval paperwork.
Step 2: Decide how much lawn to convert
You don't have to go all-in. Start with one area: the strip between the sidewalk and the street, a bed along the driveway, or a section near the house. A phased approach costs less upfront and lets you learn as you go.
Lots of people convert 30-50% of their lawn the first year and expand from there. Some stop at a single bed and are perfectly happy. There's no wrong amount.
Step 3: Kill the grass
Sheet mulching is the most common method. You're smothering the grass with cardboard and mulch. No chemicals needed.
- Mow the grass as short as possible
- Lay cardboard directly on the grass, overlapping edges by 4-6 inches (remove any tape and staples first)
- Wet the cardboard thoroughly
- Add 4-6 inches of mulch on top. Hardwood mulch or native leaf mulch both work.
- Wait 6-8 weeks. The grass will die and the cardboard will start breaking down.
For spring planting, start sheet mulching in January or February. By mid-March or early April, you'll have a ready-to-plant bed.
Step 4: Plan your planting
Before you buy anything, spend a day watching your yard. Where does the sun hit? How many hours? Is the soil sandy, clay, or rocky? These things matter more than most people realize.
Pick plants that match your conditions. Arrange them by height: low stuff in front near sidewalks, medium in the middle, tall plants toward the house or back of the bed. Group each species in clusters of 3-5 instead of scattering them around. Repetition is what makes a planting look planned.
Step 5: Plant in spring or fall
Spring is ideal for most of Texas. Roots get established before summer heat hits. Fall works too, especially for perennials and grasses. They'll put down roots over winter and come back strong.
Avoid planting in July and August. Even tough native plants struggle to establish when it's 105 degrees out.
Step 6: Water during establishment
This is the part people forget. Native plants are drought-tough once established, but that first year they need regular water. Think of it as a one-time investment: water well for one growing season, and then your watering drops to almost nothing.
General rule: water deeply 2-3 times per week for the first few months, then taper off. By the second growing season, most natives should survive on rainfall alone (with occasional deep watering during extreme drought).
Step 7: Maintain edges and mulch
This is what separates a native garden that looks intentional from one that looks neglected. Clean edges and fresh mulch do most of the heavy lifting.
- Keep a crisp edge between native beds and any remaining lawn or sidewalk
- Refresh mulch once or twice a year (2-3 inches is plenty)
- Pull weeds while they're small, especially in year one before plants fill in
- A mowed strip between native beds and public walkways goes a long way if your HOA is particular about curb appeal
For seasonal care details, our maintenance guide has you covered.
Realistic timeline and costs
Timeline for spring planting
- January/February: Sheet mulch the area you want to convert
- February/March: Apply for rebates, plan your plant list, order from native nurseries if needed
- March/April: Plant after your last frost date
- April through October: Water regularly for establishment
- Following spring: A yard that mostly takes care of itself
What it costs
- DIY: $0.50 to $2 per square foot (plants, mulch, cardboard, your weekends)
- Professional install: $2 to $5 per square foot
- A 500 sq ft conversion runs about $250 to $1,000 DIY, or $1,000 to $2,500 with a landscaper
- Rebates can cover 30-100% of the cost depending on your city
Your action item
This week, do one thing: measure the area you want to convert and check your city's rebate program. That's it. Everything else follows from there.
Ready to plan your lawn replacement?
Pollinator Patch helps you pick native plants for your specific region and lay out a yard that looks intentional from day one.